
LVIV, Ukraine Victoria Maslova walked away from her cosmetics manufacturing facility within Bucha, Ukrainian city of Bucha on the day of the Russian invasion of the country. She fled for Poland together with three of her brothers as rockets began to hit the nearby airport.
One month after, they were back in Ukraine and determined to continue making Maslova’s plant-based cosmetics brand, Vesna.
“We love Ukraine. We wanted to go back to our home country and be a part of the Ukrainian community,” says Maslova, 24, who started the company seven years ago along with her mother Inna Skarzhynska 44.
To reverse the economic sluggishness due to the largest conflict to hit Europe in the past World War Two, Ukraine’s government is placing it’s hopes on determination of individuals like Maslova as well as returning millions of refugee and massive international financial aid.
Related: Elon Musk proposes China-Taiwan tensions after Russia-Ukraine plan
In the midst of the chaotic withdrawal of Russia in April of Bucha, a town close to Kyiv known for its occupation that left civilian bodies littered across the streets, the mother of Maslova went back to her factory. The shop’s floor was broken up and looted however she salvaged the equipment and put it onto an unloader. They established a new business in relative peace of Lviv which is located about 450 km (280 miles) west of border with Poland. Polish border.
Five months after, Vesna products are sold in more countries than before which includes Poland and Lithuania and Maslova recently signed a contract to make products under a private label in the United States, she said. In the meantime, the company has also been donating products for hair and skincare, that are branded “You are our heroes” to both soldiers and women in front.
The conflict is one that Moscow describes as an “special operations of military” is in it’s eighth month. Despite recent victories by Ukraine at the front, many experts think that it will continue for quite a while and leave millions of Ukrainians in the country and an estimated 8 million outside of its boundaries.
In the same time, as Ukraine’s troops fight to win back the territory that was taken by Russia following the February. 24 war and the Ukrainian Kyiv government Kyiv is working hard to stabilize the economy, and locate employment opportunities for those who have fled their homes, jobs and businesses in the eastern and south.
The economy is projected to contract by more than 33% in the coming year, however with companies returning to business and the economic minister Yulia Svyrydenko is expecting output to stabilize and growing as high as 15% by 2023, even though it’s from a lower base. In 10 years, she hopes that it will more than double from pre-war levels and reaching $500 billion, with the help of foreign investment as well as European Union accession.
“We always insist that there are two fronts in Ukraine that are the military front and the other is the economic one,” Svyrydenko told Reuters in an interview in the basement of Ukraine’s impressive Soviet-era Cabinet of Ministers building, which is where the windows and corridors are filled with sandbags. “The economic front isn’t more important than that of the military.”
Smalland medium-sized companies such as Maslova’s are the foundation of the efforts of the government.
Economic activity was halted throughout the country when the war started, however retailers, restaurants as well as nightclubs are now open throughout Kyiv, Lviv and other cities that are not occupied, including Zaporizhzhia in the vicinity of a besieged nuclear power station.
Related: Russia fines TikTok for what it calls “LGBT propaganda” and Twitch for content from Ukraine.
The ministry of economics has assisted 700 businesses move out of areas of conflict, of which the majority have resumed the operations Svyrydenko said. The companies that have relocated are benefiting due to the return of around of 3 million refugees which is helping the demand for services, and bringing money through the economic system due to new exports, including those from the three Black Sea ports.
In order to assist companies that are displaced in making an opportunity to start over for their businesses, The Ukraine Investment and Trade Facilitation Center in Lviv provides companies with the opportunity to rent office space and manufacturing facilities, which is which is a vital source of life.
The challenge facing the nation and entrepreneurs such as Maslova is difficult in light of the recent World Bank and European Union estimate of war-related damages amounting to more than $100 billion. Then there are the ongoing Russian attacks on infrastructure used by civilians.
Ukraine is also facing a growing budgetary problems, despite the stop to debt payments made with Western government creditors in July as well as private lenders in the month of August. It is seeking aid from abroad however, it also requires private capital to help rebuild.
Any investment will need security assurances as well as strong accountability, especially given that experts from the German Marshall Fund called Ukraine’s “history of corruption” in a report released last month.
Leading economic experts from Ukraine and The World Bank, International Monetary Fund and other donors will discuss the issues in a recovery conference held by Germany in Berlin on October. 25.
The International Monetary Fund on Friday approved $1.3 billion of urgent financing for Ukraine which could spur the support of other donors, with a view to an expanded, fully-fledged program in the near future.
‘BRAVE BUSINESSES, BRAVE PEOPLE’
Iryna Tytarchuk who is the director of the center for investment in Lviv assists businesses that have been displaced with resources, such as government micro-credits and loans up to up to $68,000, as well as U.S. Agency for International Development funds targeted for female-owned businesses which helped Maslova to get back on feet.
“These are brave companies and courageous people who didn’t quit their jobs and moved to another country but have decided to go back over and over again,” she said. Tytarchuk noted that many companies experienced a rise in revenues in 2014 after they moved towards Russian markets following the annexed region of Crimea.
“Now new markets have opened up for these products,” she said, noting that many companies from Britain have contacted her in search of goods “Made by Ukraine.”
Close to the frontline, Mykolaiv, 800 kilometres (500 miles) to the southeast of Lviv is under constant artillery barrages. Here Julia Konovalova tries to bide her time, waiting to relaunch Fresh U & detox, her once-thriving health food delivery business, once the fighting ceases.
Konovalova stuck around after over half of the population of Mykolaiv left. She donated her belongings to the army after the war began and has been in charge of meals for World Central Kitchen relief group over the past few months.
“I remain with all of my equipment. The moment is now to wait until the war is over then I’ll begin again,” the former hotel manager told me. “We only need to survive.”
Related: Ukraine will get an extra $530 million from the World Bank.
Close to near the Russian border, a frenzied conflict has deprived Ukraine’s second largest cities, Kharkiv from three quarters of the city’s two million inhabitants, despite the fact that recent Ukrainian advance has reclaimed adjacent territories.
Rockets destroyed Evgeniy Safonov’s bar for wine in Kharkiv However, he’s searching for new places in more secure cities, and hopes to go back to Kharkiv at some point.
“Our customers are very interested even today,” he says. “Call me stupid or brave I’m not sure. However, our plan is only a number of weeks. It is impossible to predict what tomorrow holds.”
LOOKING FOR INVESTMENTS
Svyrydenko admits Ukraine faces a number of challenges however she claims she and her officials are looking for investment opportunities wherever they can. in a report that estimates that each investment of $10 billion will bring an increase of 5 percent in output of the country.
Her ministry is currently studying 50 requests from United States, Germany, Britain and Poland made following the introduction of a brand new “Advantage Ukraine” investment portal on the New York Stock Exchange last month. It outlines the potential for investment of $400 billion however, she said it was not yet time to reveal the details.
A private financing subsidiary known as The International Finance Corporation, and the European Bank of Reconstruction and Development earlier this month also announced they will invest 70 million dollars into a private equity fund which invests in export-oriented and tech-focused businesses in both Ukraine and the neighboring Moldova. The fund aims to raise $250 million in twelve months.
Andy Hunder, who heads the American Chamber of Commerce in Ukraine and Ukraine, stated that the country’s economy was showing “phenomenal endurance,” with internet and banking services working better during the midst of war in Kyiv as opposed to other regions of Europe in peace.
The most recent survey by the group which was released last week found that 77% of the 600 members believe that the war will be over by 2023. All but two percent are planning to continue operating in the United States.
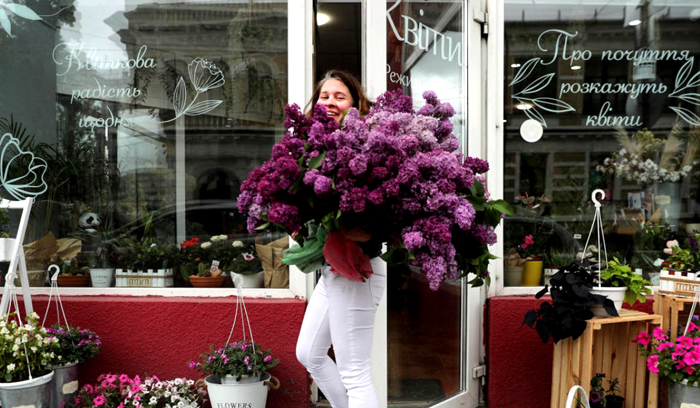
Yulia Zavalniuk, whose tiny Villa Verde flower farm about 40km to the west of Kyiv was extensively injured by Russian forces only four days after the start of war. initially considered shifting to Slovakia but then decided to move to Lviv temporarily, and then sell plants to pay employees and pay for the basic costs of business.
“Now is the right time for us, the small business owners,” She told Reuters. “We need to be the most innovative and service- and quality-oriented to make products, sell them and then pay taxeson them,” the woman said.